
Perhaps it was all that public television I watched as a child—the endless parade of British murder mysteries and historical dramas that somehow always managed to feature a large country house and garden. To me, growing up in this American land of concrete, they contained an intriguing novelty: an expansive gravel driveway that swept up, not to some dinky garage, but directly to a large, welcoming front door.
The carriage (or Rolls, or Bentley) approached, the characters alighted, and suddenly—amidst cries of “Cheerio, old thing!” and “Delighted, old chap!”—you heard that marvelously distinctive crunch, crunch, crunch of gravel underfoot, so different from the mundane thud produced by modern paving.
To this day, I adore that sound and find it one of the most soothing on earth—a calming note suggesting you’ve left behind, at least briefly, the tarmacked modern age and entered a slower-paced, more elegant world.
From these rather roundabout observations, you’ve probably already guessed that I’m a big fan of using gravel walks and gravel drives in the landscape—and fortunately, I am not alone. Gravel surfaces provide a pleasant, natural alternative to the harshness of asphalt and concrete, and they’re making a comeback in American gardens.
My Gravel Driveway Experiment in Southborough
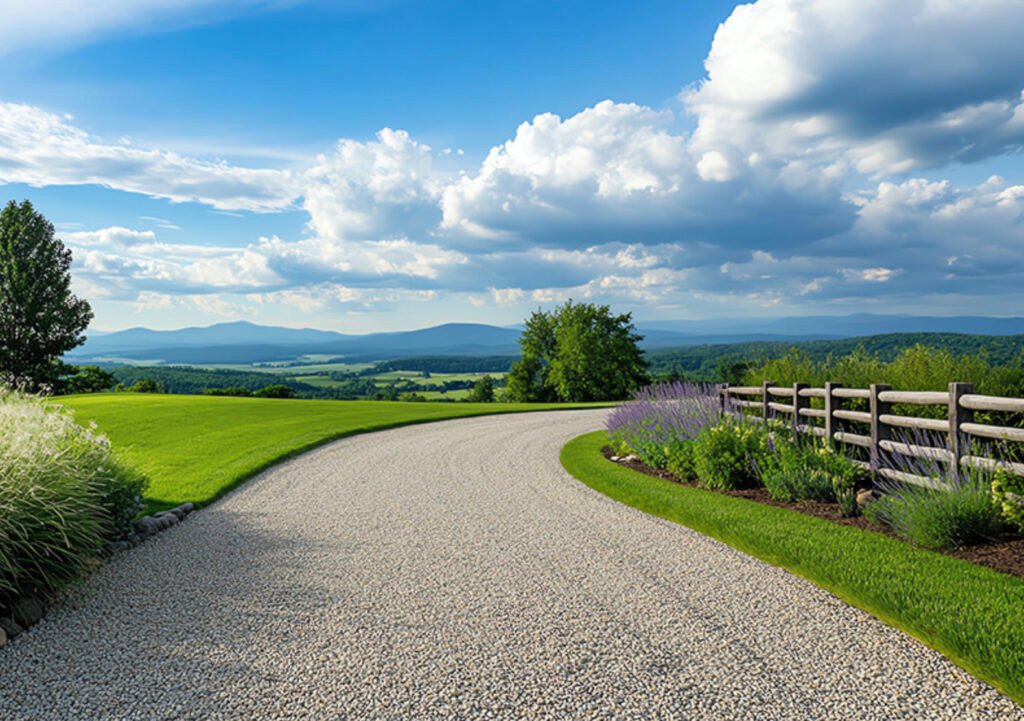
Here in Southborough, one of the first projects I tackled after moving into my 1852 farmhouse thirty years ago was to rip out the buckling asphalt driveway and replace it with a gravel driveway.
During this process, which lasted several days, quite a few of my new neighbors stopped by. Although they admired the look, they expressed concern about gravel maintenance.
This, of course, is the great bugaboo of gravel—and the reason it fell from favor in the first place. Weeding and snow removal on gravel drives have somehow been mythologized into titanic chores.
While gravel does require some extra maintenance—it needs to be raked once a year, occasionally weeded in areas of low traffic, and refreshed every four or five years—this is more than offset by its good looks and lower installation cost. The average gravel driveway is generally half as expensive as hard paving. Given these savings, the small amount of upkeep is well worth the effort.
Snow Removal on Gravel Surfaces
What most people fail to realize is that nine times out of ten, when it snows, the ground—and the gravel surface—are already frozen. This rock-hard base can be plowed or shoveled just like hard paving.
When snow comes early, before the ground freezes, simply remind your plower or snowblower to raise their blade slightly off the surface—a good practice for any gravel driveway.
While small amounts of gravel may shift during plowing, this is easily fixed in the spring with a quick raking. In my own years of experience—and in dozens of gravel installations for clients—we’ve never had serious issues with snow removal.
Gravel Design Considerations
The Character of Gravel Surfaces
Gravel walks lend a distinctly country air to a landscape. They’re a loose, informal surface—evocative of rural lanes and simpler times—and probably not the best choice for a dressy, urban environment.
(Ladies, take note: gravel is murder on high heels for any distance more than a few feet.)
Gravel paths are also problematic on slopes greater than about 20 degrees, as gravity and traffic carry the gravel downhill. In such situations, hard paving is a better option.
The Secret to Easy Gravel Maintenance: Edging
To look good and avoid maintenance headaches, gravel surfaces must be contained by some sort of edging. This is the real secret to easy-care gravel walks and gravel drives. Without edging, gravel will inevitably splay into adjoining areas.
I’m a big fan of using large cobbles (also called Belgian blocks) to contain the aggregate. The blend of stone with stone is visually pleasing and works in almost any setting.
Other popular choices include steel edging, bricks, tiles, or river stones—anything sturdy enough to keep the gravel in its intended place.
Choosing Gravel Color and Type
Gravel surfaces come in a surprisingly wide range of colors. The hue you choose will dramatically affect your landscape’s appearance.
Before making a decision, visit your local stone yard to see what’s available. Because gravel is heavy, it’s usually mined locally, meaning your choices depend on regional geology.
My personal favorite is tan and earth-toned gravel, which pairs beautifully with most garden palettes. Grays, reds, browns, and blacks are also lovely choices. White, however, tends to look severe and is best avoided.
Pay attention, too, to the type of gravel. Crushed stone binds well and is perfect for the base layers, but its jagged texture is harsh on feet. For the top layer, look for ¼-inch river-washed pea gravel—naturally rounded and smooth, providing a comfortable walking surface and pleasing appearance.
How to Install a Gravel Driveway or Walk (Step by Step)
Unfortunately, I’ve seen many so-called professionals simply dig a trench, pour in six inches of gravel, and call it done. That’s not how to do it—it will drain poorly, stay soft, and be a headache to maintain.
Here’s the right way to install gravel walks or gravel driveways:
- Excavate the base to at least one foot deep, then compact it.
- Add two to three inches of rough debris at the bottom for drainage.
- Fill with one-inch crushed stone until you’re two or three inches below the surface; compact again.
- Finish with two to three inches of pea gravel, compacted and raked level.
- Any thicker than that, and you’ll end up with a mushy surface.
- Built this way, your gravel driveway or gravel walk will provide decades of service—and reward you with that merry little crunch, crunch, crunch with every step, congratulating you on a fine addition to your garden.